

How To Render Api Call In React Redux App From Node
This is a very common question among newer React developers, and one question I had when I was starting out with React and Node.js. In this short example I will show you how to make create-react-app work with Node.js and Express Back-end.
create-react-app
Create a project using create-react-app.
npx create-react-app example-create-react-app-express Create a /client directory under example-create-react-app-express directory and move all the React boilerplate code created by create-react-app to this new client directory.
cd example-create-react-app-expressmkdir client The Node Express Server
Create a package.json file inside the root directory (example-create-react-app-express) and copy the following contents:
{ "name": "example-create-react-app-express", "version": "1.0.0", "scripts": { "client": "cd client && yarn start", "server": "nodemon server.js", "dev": "concurrently --kill-others-on-fail \"yarn server\" \"yarn client\"" }, "dependencies": { "body-parser": "^1.18.3", "express": "^4.16.4" }, "devDependencies": { "concurrently": "^4.0.1" } } Notice I am using concurrently to run the React app and Server at the same time. The –kill-others-on-fail flag will kill other processes if one exits with a non zero status code.
Install nodemon globally and the server dependencies:
npm i nodemon -g yarn Create a server.js file and copy the following contents:
const express = require('express'); const bodyParser = require('body-parser'); const app = express(); const port = process.env.PORT || 5000; app.use(bodyParser.json()); app.use(bodyParser.urlencoded({ extended: true })); app.get('/api/hello', (req, res) => { res.send({ express: 'Hello From Express' }); }); app.post('/api/world', (req, res) => { console.log(req.body); res.send( `I received your POST request. This is what you sent me: ${req.body.post}`, ); }); app.listen(port, () => console.log(`Listening on port ${port}`)); This is a simple Express server that will run on port 5000 and have two API routes: GET - /api/hello, and POST -/api/world.
At this point you can run the Express server with the following command (still inside the root directory):
node server.js Now navigate to http://localhost:5000/api/hello, and you will get the following:
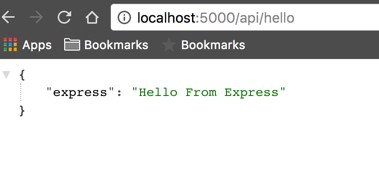
We will test the POST route once we build the React app.
The React App
Now switch over to the client directory where our React app lives.
Add the following line to the package.json file created by create-react-app.
"proxy": "http://localhost:5000/" The key to using an Express back-end server with a project created with create-react-app is to use a proxy. This tells the Web-pack development server to proxy our API requests to our API server, given that our Express server is running on localhost:5000.
Now modify ./client/src/App.js to call our Express API Back-end, changes are in bold.
import React, { Component } from 'react'; import logo from './logo.svg'; import './App.css'; class App extends Component { state = { response: '', post: '', responseToPost: '', }; componentDidMount() { this.callApi() .then(res => this.setState({ response: res.express })) .catch(err => console.log(err)); } callApi = async () => { const response = await fetch('/api/hello'); const body = await response.json(); if (response.status !== 200) throw Error(body.message); return body; }; handleSubmit = async e => { e.preventDefault(); const response = await fetch('/api/world', { method: 'POST', headers: { 'Content-Type': 'application/json', }, body: JSON.stringify({ post: this.state.post }), }); const body = await response.text(); this.setState({ responseToPost: body }); }; render() { return ( <div className="App"> <header className="App-header"> <img src={logo} className="App-logo" alt="logo" /> <p> Edit <code>src/App.js</code> and save to reload. </p> <a className="App-link" href="https://reactjs.org" target="_blank" rel="noopener noreferrer" > Learn React </a> </header> <p>{this.state.response}</p> <form onSubmit={this.handleSubmit}> <p> <strong>Post to Server:</strong> </p> <input type="text" value={this.state.post} onChange={e => this.setState({ post: e.target.value })} /> <button type="submit">Submit</button> </form> <p>{this.state.responseToPost}</p> </div> ); } } export default App; We create callApi method to interact with our GET Express API route, then we call this method in componentDidMount and finally set the state to the API response, which will be Hello From Express.
Notice we didn't use a fully qualified URL http://localhost:5000/api/hello to call our API, even though our React app runs on a different port (3000). This is because of the proxy line we added to the package.json file earlier.
We have a form with a single input. When submitted calls handleSubmit, which in turn calls our POST Express API route then saves the response to state and displays a message to the user: I received your POST request. This is what you sent me: [message from input].
Now open ./client/src/App.css and modify .App-header class as follows (changes in bold)
.App-header { ... min-height: 50%; ... padding-bottom: 10px; } Running the App
If you still have the server running, go ahead and stop it by pressing Ctrl+C in your terminal.
From the project root directory run the following:
yarn dev This will launch the React app and run the server at the same time.
Now navigate to http://localhost:3000 and you will hit the React app displaying the message coming from our GET Express route. Nice ?!

Now, type something in the input field and submit the form, you will see the response from the POST Express route displayed right below the input field.
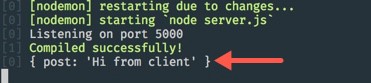
Finally take a look at at your terminal, you will see the message we sent from the client, that is because we call console.log on the request body in the POST Express route.
Production Deployment to Heroku
Open server.js and replace with the following contents:
const express = require('express'); const bodyParser = require('body-parser'); const path = require('path'); const app = express(); const port = process.env.PORT || 5000; app.use(bodyParser.json()); app.use(bodyParser.urlencoded({ extended: true })); // API calls app.get('/api/hello', (req, res) => { res.send({ express: 'Hello From Express' }); }); app.post('/api/world', (req, res) => { console.log(req.body); res.send( `I received your POST request. This is what you sent me: ${req.body.post}`, ); }); if (process.env.NODE_ENV === 'production') { // Serve any static files app.use(express.static(path.join(__dirname, 'client/build'))); // Handle React routing, return all requests to React app app.get('*', function(req, res) { res.sendFile(path.join(__dirname, 'client/build', 'index.html')); }); } app.listen(port, () => console.log(`Listening on port ${port}`)); Open ./package.json and add the following to the scripts entry
"start": "node server.js", "heroku-postbuild": "cd client && npm install && npm install --only=dev --no-shrinkwrap && npm run build" Heroku will run the start script by default and this will serve our app. Then we want to instruct Heroku to build our client app, we do so with heroku-postbuild script.
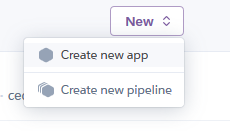
Now, head over to Heroku and log in (or open an account if you don't have one).
Create a new app and give it a name
Click on the Deploy tab and follow the deploy instructions (which I think they are pretty self-explanatory, no point on replicating them here ?)
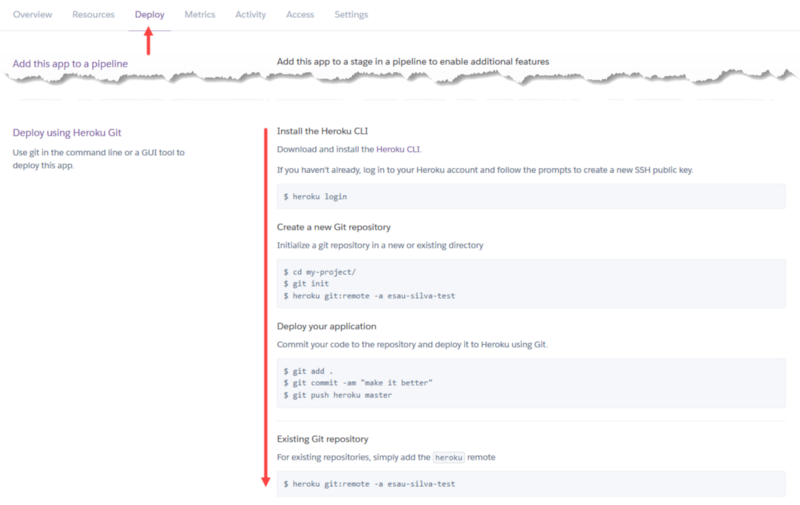
And that is it, you can open your app by clicking on the Open app button at the top right corner within the Heroku dashboard for your app.
Visit the deployed app for this tutorial: https://cra-express.herokuapp.com/
Other Deployment Options
I write about other deployments options here:
- Netlify
- Now
- Heoku (more in-depth explanation)
Project Structure
This will be the final project structure.
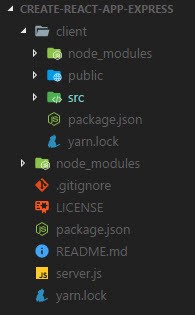
Get the full code on the GitHub repository.
Thank you for reading and I hope you enjoyed it. Any question, suggestions let me know in the comments below!
You can follow me on Twitter, GitHub, Medium, LinkedIn or all of them.
This post was originally posted on my personal blog website.
Update 8/25/19: I have been building a prayer web app called "My Quiet Time - A Prayer Journal". If you would like to stay in the loop please sign up through the following link: http://b.link/mqt
The app will be released before the end of the year, I have big plans for this app. To see some mockup screenshots follow the following link: http://pc.cd/Lpy7
My DMs on Twitter are open if you have any questions regarding the app ?
Learn to code for free. freeCodeCamp's open source curriculum has helped more than 40,000 people get jobs as developers. Get started
How To Render Api Call In React Redux App From Node
Source: https://www.freecodecamp.org/news/how-to-make-create-react-app-work-with-a-node-backend-api-7c5c48acb1b0/
Posted by: jeremiahcamagirse.blogspot.com
0 Response to "How To Render Api Call In React Redux App From Node"
Post a Comment